Add Categories, Types, and Solutions for vCIO
Adding categories, types, and solutions for vCIO is essential for organizing and managing your IT services effectively. This guide will walk you through the process step by step, ensuring you can easily configure and customize your vCIO settings to meet your specific needs.
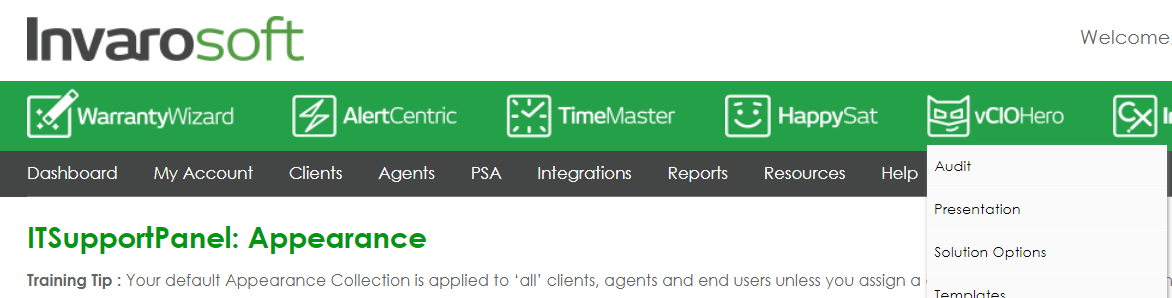
Step 1
Green bar >> vCIOHero
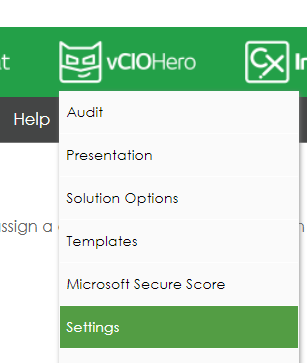
Step 2
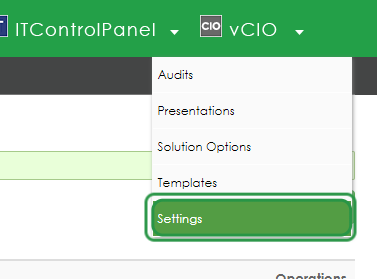
Click on Settings
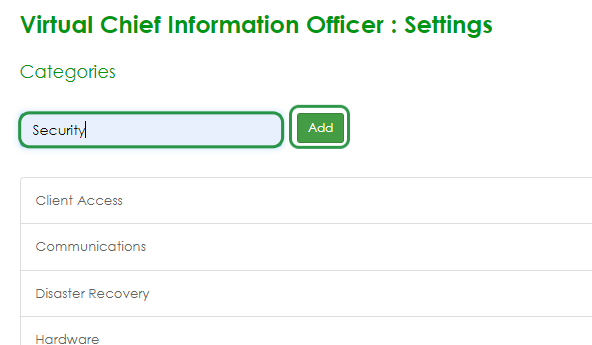
Step 3
Type the Category you want to add and click "Add" to save it.
For instance: Security, Communications, or those you consider.
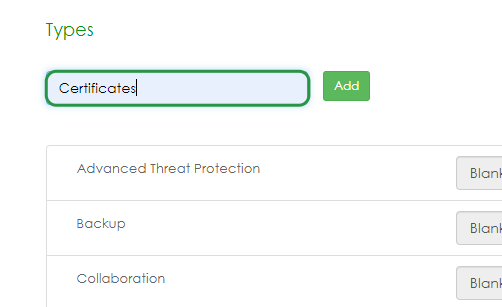
Step 4
Write the item Type you want to add and click "Add" to save it.
Step 5
Once you finish adding your types and categories, go to the Green bar>> vCIO>> click on Solution Options

Step 6
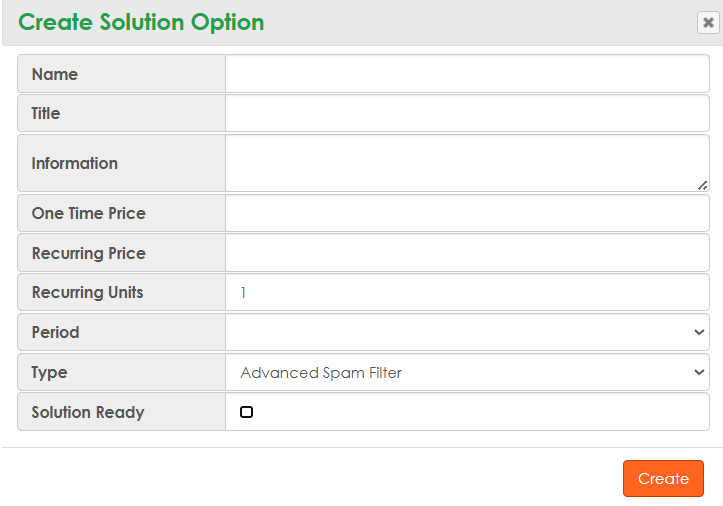
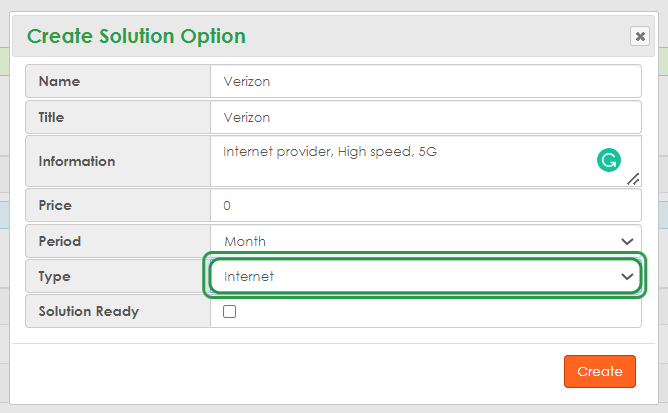
Click on Create Solution Option, and a pop-up window will open.

Step 7
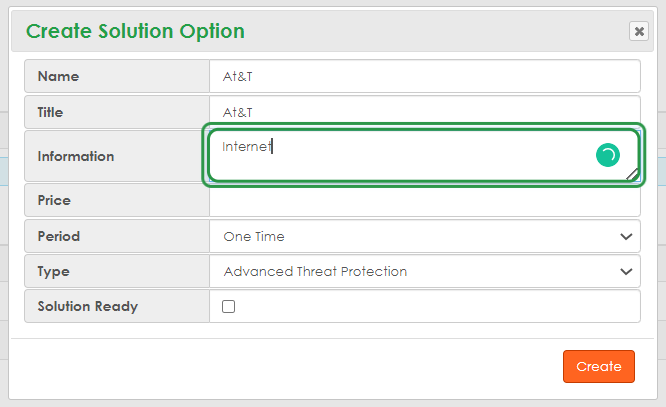
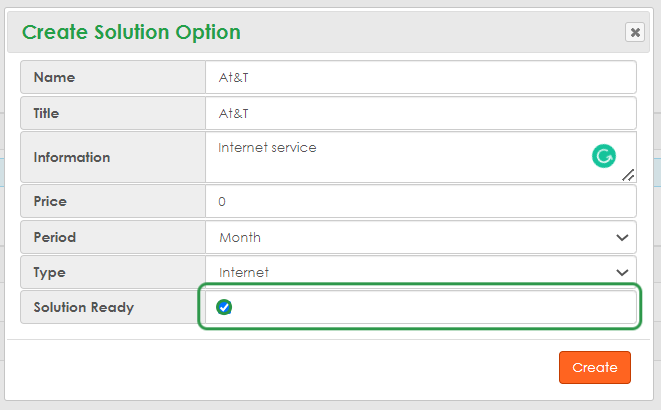
In the "Name" box, enter the Name of the Solution.
Step 8
In the "Title" box, give a name to the solution (it can be the same as the title).

Step 9
In the "Information" box, write the information or characteristics about that solution (For internet case: 5G, High Speed, 1 GIG).
Step 10
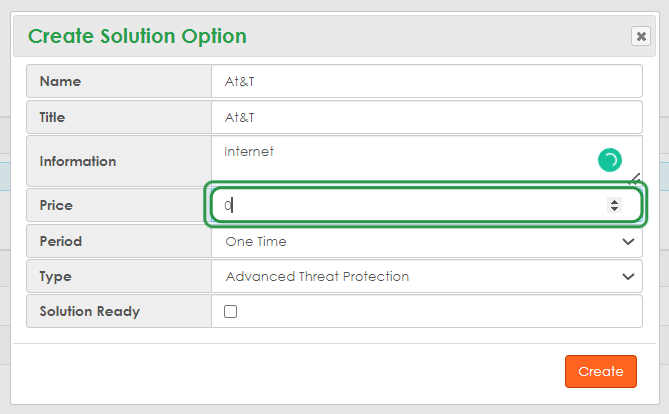
If you know the price add it in the "Price" box. If you don't have the price enter 0.
Step 11
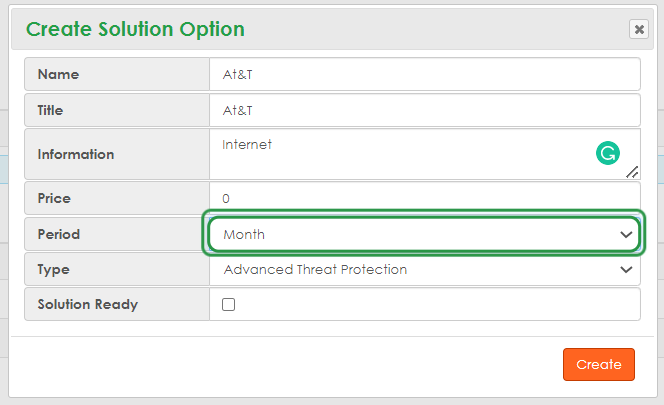
In the "Period" box, choose the periodicity to be paid.
Step 12
In the "Period" box, choose the periodicity to be paid.
Step 13
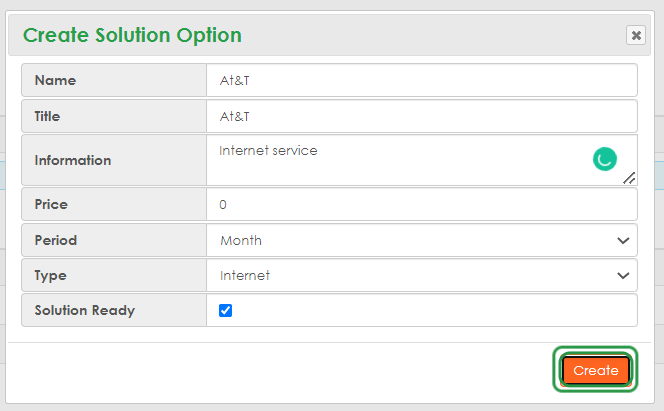
Check the box "Solution Ready".
This step allows the solutions to be used in presentations.
Step 14
And finally, click on Create.
You can continue creating solutions as you wish, following the same steps.
You can create as many solutions as you need per item, but you can choose only three for each item to reflect in the audit presentation.
If you want the solutions to come out automatically when you make the presentation, you can do the following steps:
Step 15
Click on SettinGreen bar >> vCIO>>Settings
Step 17
Choose the type for which you want to set up one or more solutions, and click on the "Edit" Button.

Step 18
Select the option you want to set in each box.
Please remember that there are three options, the left being the least interesting for you and the right being the most interesting.

Step 19
Once you have set the options, click on Update.

Step 20
In the pop-up, click on Yes

You can repeat the steps until you finish with the items you have chosen to have solutions.
Was this article helpful?
That’s Great!
Thank you for your feedback
Sorry! We couldn't be helpful
Thank you for your feedback
Feedback sent
We appreciate your effort and will try to fix the article