| Invarosoft Portal · Integrations |
Connect a customer's AzureAD tenancy to Invarosoft
The AzureAD Integration links your customer's AzureAD users with their Invarosoft user records, enabling automated and SSO login across the Invarosoft product range. Invarosoft (and PSA) user records are also created for every AzureAD user found in the connected tenancy.
This guide walks you through connecting a single customer tenancy using the Direct method: you'll run a PowerShell script that creates the Invarosoft AzureAD application in the tenancy, then enter the values it returns into the Invarosoft Portal.
| Before you start: make sure you have the following at hand. |
- Access to the Invarosoft Portal, with the customer already set up as a client
- Administrator credentials for the customer's AzureAD tenancy
- A Windows computer where you can run PowerShell scripts
| Log in to the Invarosoft Portal |
Sign in to the Invarosoft Portal with your usual account.
| Open the client's AzureAD settings |
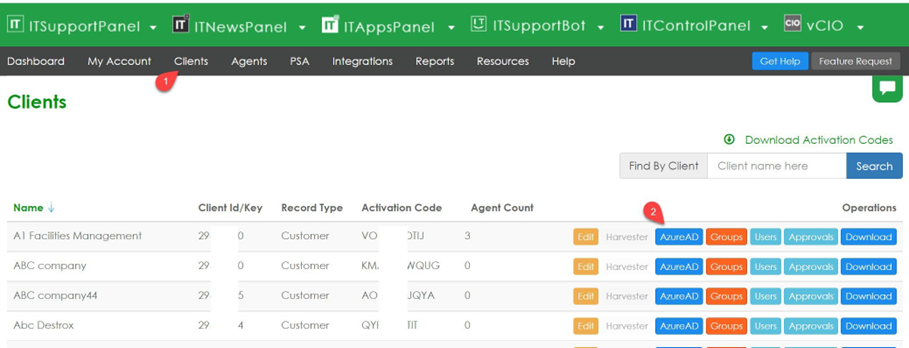
Go to the Clients page, find the client you want to connect, and click the AzureAD button on its row.
| Download the Direct PowerShell script |
Select the Direct Tenancy option, then click Download PowerShell Script. The script you get is customised for this specific Invarosoft client.

| Run the script on your computer |
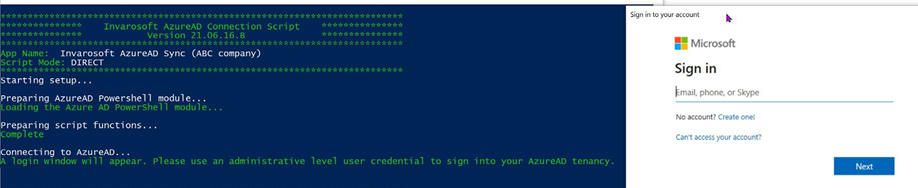
Run the script locally. If PowerShell asks you to change the execution policy, accept the change; the script won't work otherwise. You're welcome to review the script before running it.

| Sign in with the customer's tenancy credentials |
When the Microsoft sign-in window appears, log in with an administrator account from the customer's tenancy. These credentials are not stored; they're only used so the script can create the Invarosoft AzureAD application inside the customer's tenancy.
| Copy the values the script returns |
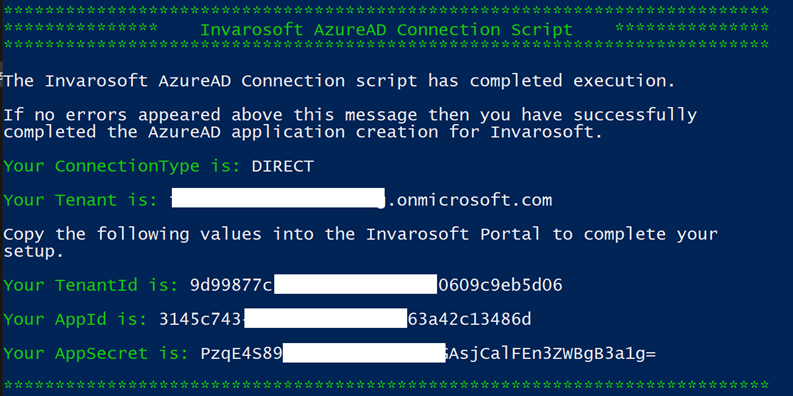
The script keeps running after you sign in. If no errors appear, it has finished successfully and shows three values at the end: TenantId, AppId and AppSecret. Copy them; you'll need them in the next step.
| Enter the values in the portal and save |
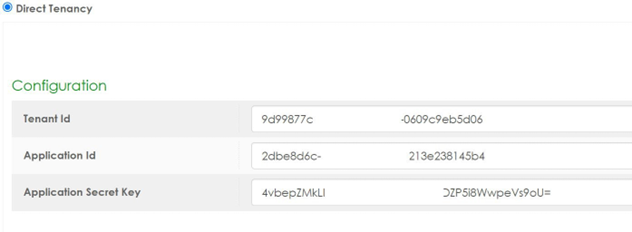
Back on the client's AzureAD page, with Direct Tenancy still selected, paste the values into Tenant Id, Application Id and Application Secret Key, then click Save.
We recommend reading How the sync works below before turning on any PSA Sync settings.
| Check the confirmation |
The system tests the values you entered. If the test succeeds, you'll see a confirmation message and the AzureAD Configuration page with the tenant details and the tenancy's users listed under User Listing.
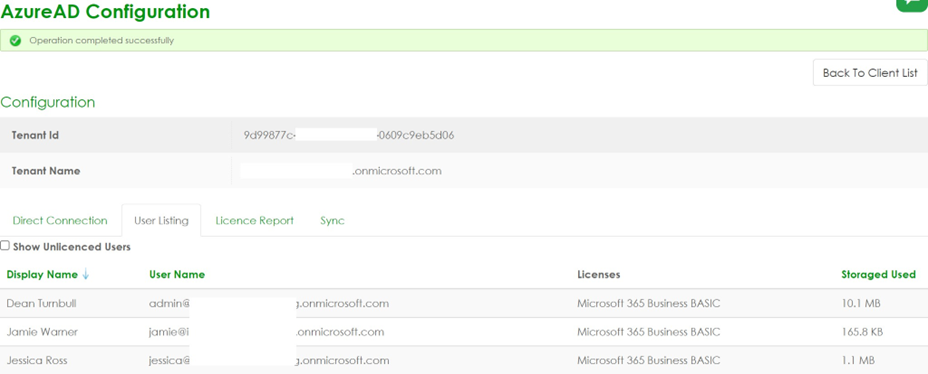
| Done. The customer's AzureAD tenancy is now connected to the Invarosoft client, and the system will start syncing its AzureAD users with Invarosoft users automatically. |
Once a tenancy is connected, each AzureAD user is either linked to an existing Invarosoft user, or a new Invarosoft user is created and linked. If your partner account is connected to a PSA, the same happens with PSA users.
- When a matching user record is identified, it's linked automatically.
- When there are close or multiple possible matches, the user goes to the Pending Decision list, found under User Intervention Records (click Manage).
- The sync runs every 24 hours. You can also run it on demand for a single client, and check its status, on the client's Sync tab.
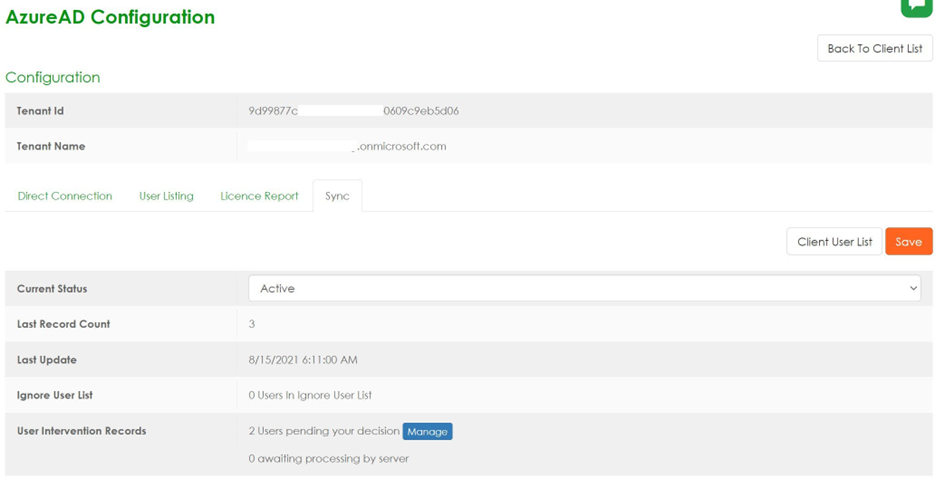
The AzureAD Integration can keep these values up to date in your PSA, based on AzureAD:
Which setting applies depends on how the client is connected:
Partner method 1. Integrations → AzureAD (default for all clients) 2. Clients → AzureAD → Sync (overrides the default) | Direct method 1. Clients → AzureAD → Sync |
For clients connected with the Partner method, the setting on the client's Sync tab overrides the general one in Integrations.
Was this article helpful?
That’s Great!
Thank you for your feedback
Sorry! We couldn't be helpful
Thank you for your feedback
Feedback sent
We appreciate your effort and will try to fix the article