Step-by-Step Guide Push Notifications
Guide to configuring our push notifications option. Includes sending push notifications, viewing push notifications sent, and creating push notification templates.
Before you start, it may be useful to create groups to send push notifications:
Create groups for push notifications
Step 1
Log in to your admin portal
Send push notifications
Step 2
Click on CxInvarosoft >> ITNewsPanel >> Push >> Send Push

Step 3
Fill the fields. The name corresponds to how you will label this notification so you can easily recognize it. -

Step 4
In "Destination," Click on Select to choose the users who will receive it

Step 5
If you already have groups created (Create groups for push notifications) select the group. If not, go to Clients. Click the arrow to expand the list of groups or clients.
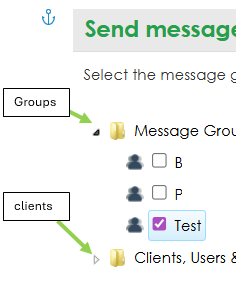
Step 6
Then check the box next to the group, client, or individual you want to send it to. Make sure to complete the entire selection in one step.

Step 7
Click on Done

When you click Done, you will see how many users or groups the message will be sent to. In this case, I selected one client, one existing group, and one user from a different client than the one selected.

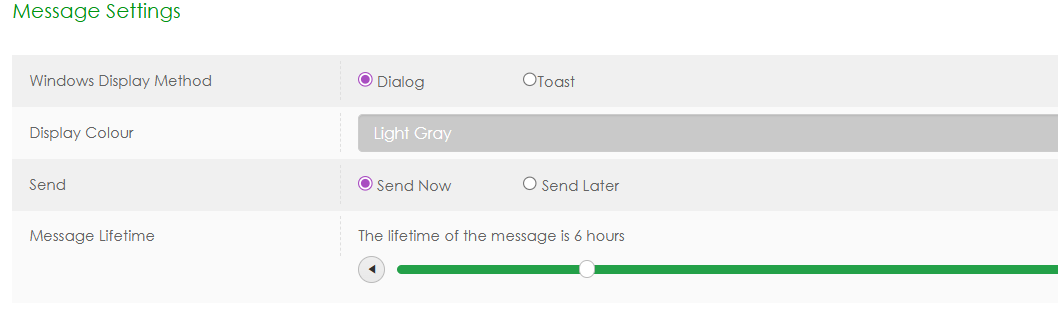
Step 8
Choose when you want to send it and the time it takes
Step 9
*You can start the message from scratch or choose to make the notification from a template Templates - Push notifications
If you don't want to start from a template, go straight to writing a title and continue to fill in the fields

Step 10
Finish filling in the fields, and once you’re done, click Send (or Save for later if you want to complete it later).

To view push notification logs
Remember that for the push notification to be displayed to the user, they must be online and authenticated at the time the push notification is received.
Step 11
Click on CXInvarosoft >> ITNewsPanel >> Push >> Push List

Step 12
Click on 1 Read

Step 13
All log information will be displayed

To create users who can receive push notifications
Step 12
Click on Groups

Step 13
Click on New Group

Step 14
Type a name for the group

Step 15
Click on OK

Step 16
Click on description

Step 17
Click on The Save button

Step 18
If you want to edit a group, choose the group and then Click on Edit

To create push templates
Step 19
Click on Templates

Step 20
Fill the fields

Step 21
Click on Create

Was this article helpful?
That’s Great!
Thank you for your feedback
Sorry! We couldn't be helpful
Thank you for your feedback
Feedback sent
We appreciate your effort and will try to fix the article